-
L’outil informatique a connu une grande expansion avec l’apparition d’internet qui a brisé les limites de l’espace. Ainsi, internet représente aujourd’hui le plus grand réseau mondial et tient une place…
Continuer la lecture » -

Bien plus qu’un simple logiciel, la business intelligence ou informatique décisionnelle prend la forme d’un assistant personnel ayant comme principale tâche de vous aider à mieux gérer les décisions à…
Continuer la lecture » -
Que vous soyez en mobilité ou bien installé dans votre chambre, le routeur Wifi est ce qu’il vous faut pour rester connecté à internet. C’est un équipement réseau qui assure…
Continuer la lecture »


Comment jouir d’une bonne protection en ligne ?
L’outil informatique a connu une grande expansion avec l’apparition d’internet qui a brisé les limites de l’espace. Ainsi, internet représente aujourd’hui le plus grand réseau mondial et tient une place…
Lire la suite »
Business intelligence : quels sont ses avantages ?
Bien plus qu’un simple logiciel, la business intelligence ou informatique décisionnelle prend la forme d’un assistant personnel ayant comme principale tâche de vous aider à mieux gérer les décisions à…
Lire la suite »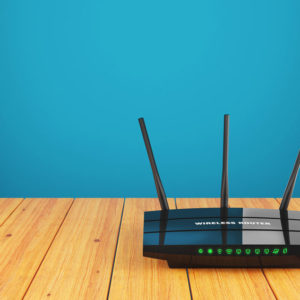
Routeur Wifi : Description, utilité, prix et critères de choix !
Que vous soyez en mobilité ou bien installé dans votre chambre, le routeur Wifi est ce qu’il vous faut pour rester connecté à internet. C’est un équipement réseau qui assure…
Lire la suite »
Comment transférer vos photos iPhone vers PC en un clin d’œil
Votre iPhone regorge de splendides clichés, mais sa mémoire s’essouffle ? Pas de panique ! Nous vous dévoilons les astuces les plus efficaces pour transférer vos trésors photographiques vers votre ordinateur. Méthode 1 :…
Lire la suite »
Informatique : Les étiquettes de code-barre pour faciliter vos inventaires
Vous gérez une petite boutique ou peut-être même une grande entreprise. Dans les deux cas, nous savons combien gérer correctement des stocks peut être une activité chronophage et complexe. Une…
Lire la suite »
Comparatif des IA génératrices d’images
L’intelligence artificielle n’a de cesse de repousser les limites de la création numérique. Après avoir révolutionné l’écriture, la voici qui s’attaque à l’image avec une redoutable efficacité. Midjourney et DALL-E,…
Lire la suite »
Comment protéger sa tablette tactile contre les virus ?
Les tablettes tactiles sont très souvent utilisées pour diverses activités en ligne. Cependant, tout comme les ordinateurs, elles sont également des cibles faciles pour les virus et autres menaces informatiques….
Lire la suite »
L’évolution technologique : quand téléphones et ordinateurs redéfinissent notre quotidien
L’évolution rapide des technologies a profondément transformé les habitudes de vie au cours des dernières années. Qu’il s’agisse des modes de communication, des façons de travailler ou de se divertir,…
Lire la suite »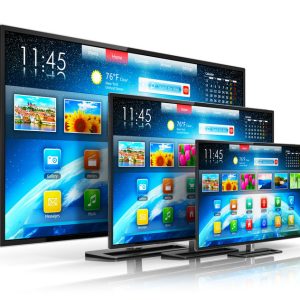
Quelles différences entre les téléviseurs 4K et 8K ?
Vous envisagez d’acheter un téléviseur et vous souhaitez obtenir la meilleure qualité d’image possible ? Pour être en mesure de choisir un appareil qui vous offrira une satisfaction inégalée à ce…
Lire la suite »
3 métiers IA à découvrir en 2024
Aujourd’hui, le monde se tourne de plus en plus vers l’intelligence artificielle, avec son impact qui se ressent dans presque tous les secteurs d’activité. Pour rester en phase avec cette…
Lire la suite »
Les meilleures façons de se divertir en ligne
À l’ère du numérique, Internet offre une pléthore d’options pour se divertir et s’évader du quotidien. En effet, le vaste monde virtuel regorge d’activités captivantes. Des jeux vidéo immersifs aux…
Lire la suite »
3 étapes à suivre pour digitaliser le CSE de son entreprise
Face à un monde du travail en pleine évolution, les CSE doivent rapidement s’adapter pour demeurer efficaces et pertinents. À l’ère du numérique, il est inconcevable que ces comités continuent…
Lire la suite »
Comment installer des panneaux acoustiques ?
Des dispositifs très pratiques pour absorber les nuisances sonores, les panneaux acoustiques assurent la réduction du temps de réverbération des sons dans une pièce. Cependant, pour profiter de leur plein…
Lire la suite »